We are very happy with the SolarMaax. We highly recommend it to anyone that is looking for a quiet system that uses very little power. We are not employed by, subsidized or sponsored by ElectroMaax.
Years ago we bought a 12-volt portable water maker, and while it reliably produced fresh water, its drawbacks soon became apparent. The cumbersome size complicated storage and each use required setting it up anew. Noise levels were intolerably high, both on deck and inside the boat, necessitating hearing protection. Moreover, the lack of a straightforward flushing mechanism made maintenance tedious, especially when we wanted to keep the system ready without resorting to full pickling. The flushing process was just as inconvenient as regular operation, demanding setup and enduring the noise all over again.
We Shopped Around and Researched Watermakers
We shopped around and researched watermakers, and as you probably know there are many out there ranging from full systems in enclosures to build your own systems.
We decided on the SolarMaax marine watermaker from Electromaax because it met all our critical needs.
- Readily available parts that are easily sourced.
- Price – everyone wants a good price. We looked at many online, spoke to several suppliers/OEMs/distributors by phone and email, we saw them at shows/talked to the people in the booth, and spoke with many different users.
- Permanent installation – The components can be mounted where you want, and where they will fit. They do not all have to be in one location. There are other systems that can provide this functionality too, but this system met that requirement and was not a package system that required a large space in one location.
- 12 volt power so we can operate it from the solar system we have on board. The system uses about 120 Watts. With our solar system we can run the system, even on overcast days, and not draw from the batteries.
- We don’t want to sacrifice flow rate with a 12 volt system, as compared to a 120 or 220 volt system, but the low power consumption is the benefit so we can run the water maker every 2 to 3 days for a few hours and top off the tank.
- We do not need to run a generator, use the inverter or run the engine to operate the water maker.
- Quiet. This system must be very quiet. We have it installed under the settee in the saloon and the sound level is so low we can have a normal conversation without having to increase the volume of our voices..
- Easy to start, run, shutdown, flush and pickle. The control panel makes it easy to perform all of the functions and we placed it in a convenient location. We modified the panel and added some functionality that we wanted. More on that below.
- Automatic and manual flushing. The system provides easy operation of both manual and automatic flush functions which we wanted to be able to flush the system when we are back at the dock for short periods of time and plan to go back out and be on the hook. That way we do not have to pickle the system every time we go back into port.
- Ease of long term storage. Pickling the system is easy and similar to other system and the “kit” came with the valves to make that easy.
- Readily available parts that can be sourced just about anywhere. Other than the Clark pump, the system uses standard filters, fittngs, membrane, etc. Parts are easily purchased online or in many local hardware stores.
- Price. Everyone wants a good price. The price for the SolarMaax was comparable to other similar systems. Some were slightly lower price and some were higher. Some were much higher.We had a few questions before we ordered, and they were all answered quickly by ElectroMaax.
We Placed the Order and Started the Install
We placed the order and received the new watermaker within a couple of weeks. We knew where we wanted to install it and once we had it, we started placing the components where we thought would be the best layout.
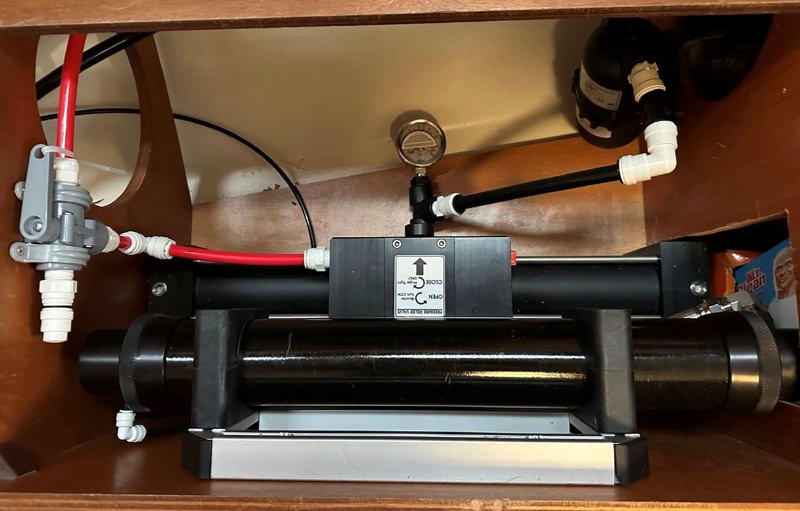
Not having too much room we did have to make some changes to the system to get the best fit. We removed the Clark Pump from the rails and mounted it on the deck inside the settee. We kept the membrane housing attached to the rails and mounted it on the bulkhead of the settee – perpendicular to the Clark Pump – making sure the high pressure hoses would reach.
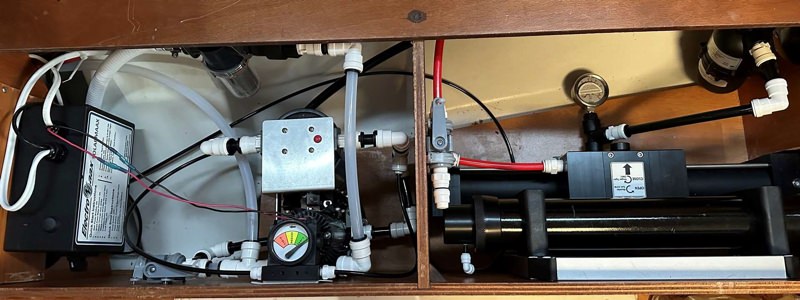
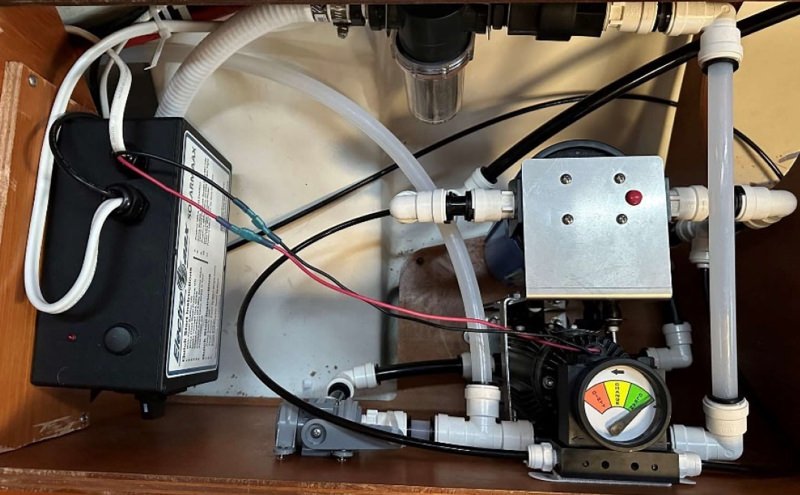
We removed the control/electrical box from the pump/filter assembly. The pump/filter assembly were mounted on the deck in the adjacent space in the settee where the Clark Pump and membrane are mounted.
We also mounted the control/electrical box on the bulkhead in the same location as the pump/filter assembly. Making those changes to the mounting was easy and made it possible for us to fit these components in the space we had available.
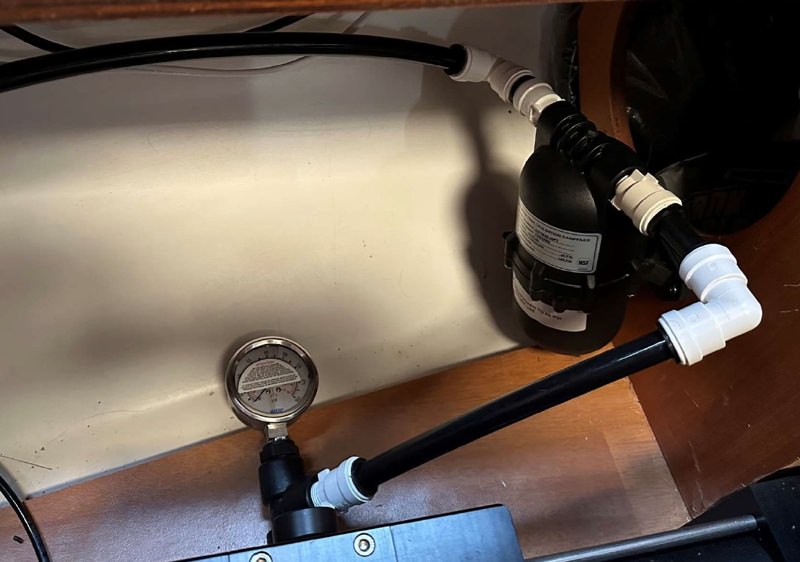
Also mounted in those spaces was the accumulator and the raw water strainer.
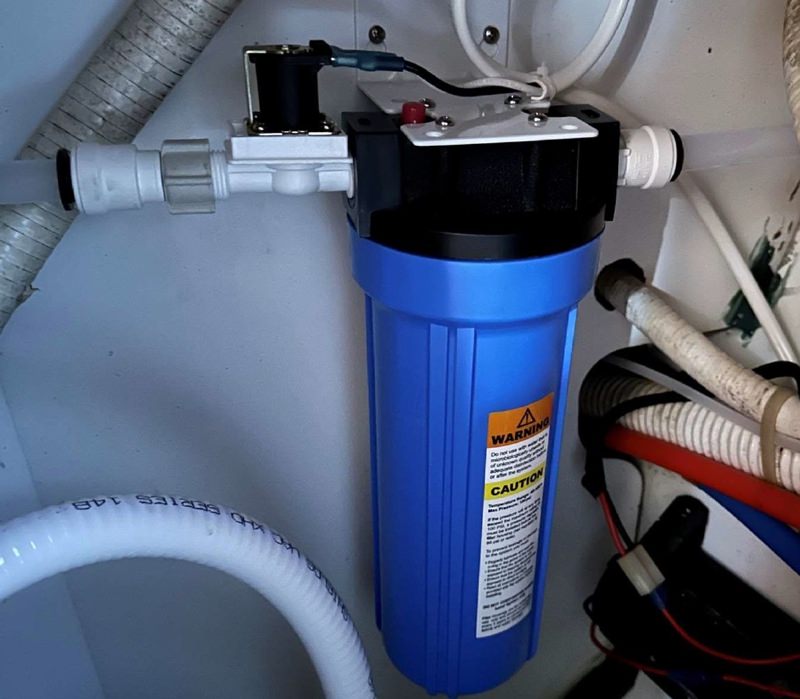
The solenoid valve/carbon filter assembly was mounted under the sink in the head that was just on the other side of the bulkhead from the settee.
There was plenty of room under the sink and the end of the freshwater line was under that same sink making it very easy to connect to it for the flushing water.
We did have to purchase an adapter to connect the tubing supplied with the SolarMaax to our freshwater system.
Our freshwater system is 15mm and the supplied tubing is US inch. Luckily,
Whale makes the adapter (quick connect on both ends) and we found it at West Marine on the shelf.
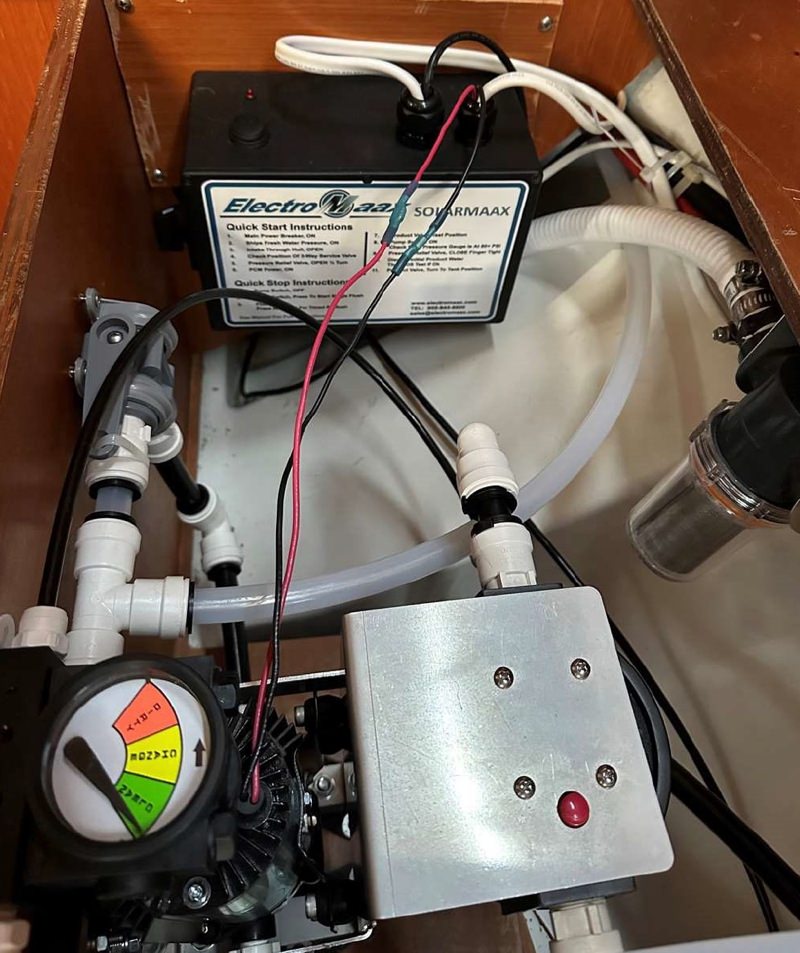
We Made Our Own Control Panel
We chose to make our own control panel and used most of the components from the supplied control panel, plus some additions we wanted. We have two freshwater tanks, and we added a second 3 way valve to allow us to choose which tank will be filled from the control panel.
We can also switch from one tank to the other while in operation. The 3 way valve is a non shutoff type that will not stop flow while it is being switched and is the same 3 way valve that is used on the supplied control panel for switching from Test to Tank.
We installed an inline TDS sensor in the freshwater line coming from the system to the control panel. The monitor for the TDS sensor is mounted on the front of the control panel and we can monitor the TDS the entire time the system is in operation and not have to take manual readings to check the water.
We eliminated the test port on the front of the panel and ran the port for Test on the Test/Tank 3 way valve to a non valved faucet that flows into the sink in the forward head. That provides us the ability to monitor the flow when in test without having to run it to a bucket. It also provides a way to connect a hose to the faucet where we can fill bottles or other containers for our own use or for other boaters if they need fresh water.
We ran the lines from the Tank selector 3 way valve to the vent lines on each tank for filling each tank.
Once we were out of the harbor, at the islands and on anchor, we started the commissioning. The commissioning went well, and we ran the system per the instructions to flush out the membrane. We followed the startup instructions and started making fresh water.
The TDS dropped in range in a short period of time, and we did the scary taste test. My better half is a water chemist, so she knows what she is doing, and we were good to go. We switched to filling the forward tank and ran for about 3 hours at a flow rate of 9 gallons per hour (34 liters per hour).
The sea water temperature was 69 F (20.6 C). I checked the power draw, and it was right at 120 watts. The voltage was 13.2 volts and current was 9.1 Amps. The system was running perfectly.
We ran it again a couple of days later and then we headed back to the marina. Three days at the dock and we ran the first flush and placed the flush in automatic per the instructions. The flush ran great, and I timed it right at 5 minutes. Three days later the flush started automatically and ran for 5 minutes.
The sound levels are very low and normal conversations can be held anywhere inside the boat without having to increase voice volume.
Kevin. M