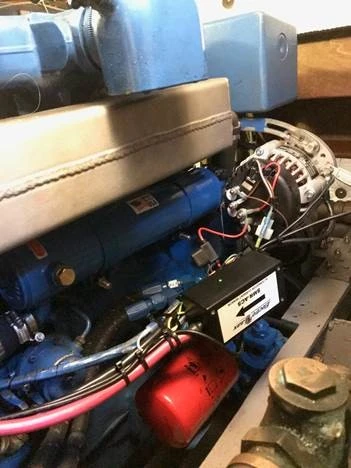
Here’s an install of our alternator and serpentine pulley kit on a Perkins 4.236 engine using our custom alternator bracket.
Background
The OEM alternator bracket mounted to the block could no longer be tightened reliably. The bolts, previously studs, had elongated the holes in the mount. The crank pulley shaft extension drove a second 120A Leece Neville alternator as well as hydraulic pump and emergency bilge pump. The ElectroMaax serpentine pulley belt conversion kit allowed the crankshaft pulley extension to be remounted and continue driving the hydros and bilge pump. This conversion would eliminated the need for a 2nd alternator by replacing the OEM 55A DelcoRemy with a high output ElectroMaax alternator. After discussing the potential for conversion ElectroMaax agreed to supply a replacement mounting bracket, serpentine belt conversion kit for Perkins 4-236 along with a high output alternator and E-MAAX smart, external regulator.
Serpentine Pulley Kit
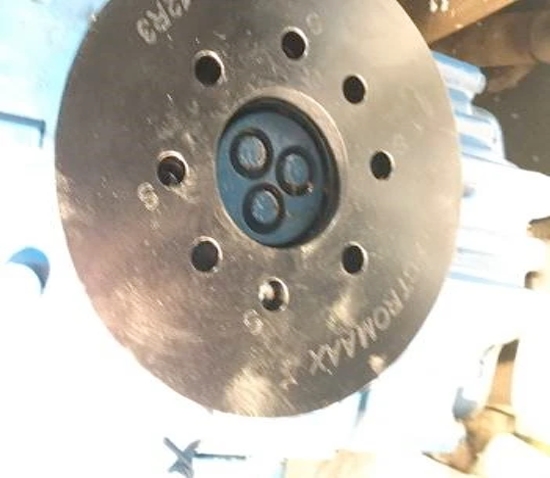
The kit includes a belt, replacement water pump pulley, crank pulley that fits over the existing crank pulley with mounting bolts, tubes of Loctite and anti-seize grease. Since maintenance was due on the heat exchanger, we drained the coolant and removed the expansion tank. With easier access, we removed the water pump pulley using an impact on the retaining nut while keeping tension on the V-belt to keep the pulley from turning.
Removed the bolts on the face of the OEM pulley and with a pulley puller the pulley came right off. There is a woodruff key for the pump shaft. The first attempt on mounting the new pulley sent the woodruff key askew and had to start over. The second attempt was successful by honing down the woodruff key and the keyway in new pulley until it slid easily in and out of the new pulley keyway. Also, we removed the anodizing from the pulley shaft hole to make sure it slid on easily without binding. Used a zinc chromate anti-seize paste on surfaces where dissimilar metals touched to inhibit any electrolysis.
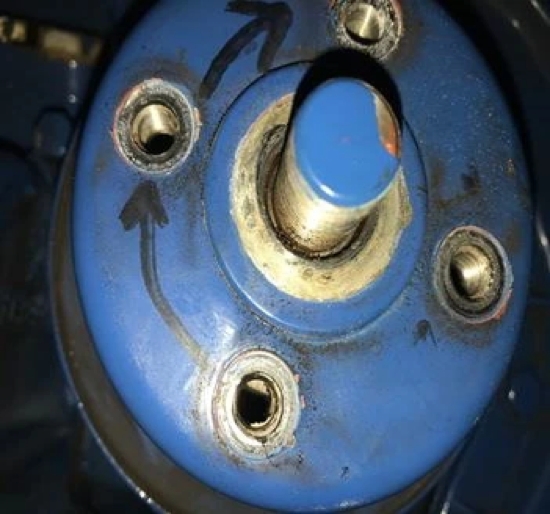
Remove OEM water pump pulley
The new crank pulley slides over the existing crank pulley. After removing the mounting bolts, it was clear the tolerances were too close for the pulley to just slip over the existing crank pulley. First removed all the paint and corrosion off the face and perimeter of engine crank pulley. With the blessing of tech support, removed the annodizing from the inside rim of serpentine crank pulley. Kept removing material until the new pulley slipped on and could rotate to line up bolt holes. This is not unusual as all OEM parts are not exactly the same. Once again, lathered all contact surfaces of dissimilar metals with a zinc chromate paste.
New crank pulley in place after removing excess material from both pulleys
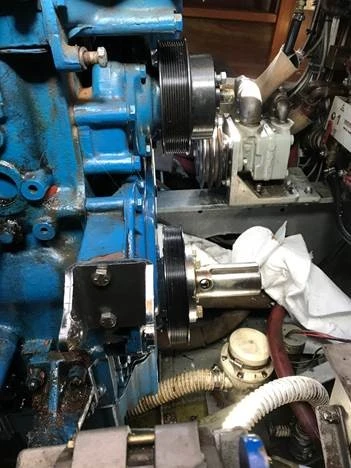
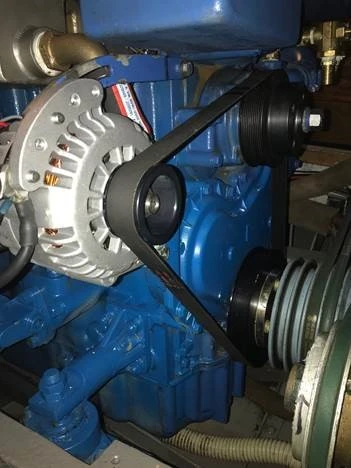
Pulleys and new alternator bracket mounted. Used a straight edge along the face of the engine to measure from to check if the pulleys were in the same plane.and aligned.
It took several attempts to get the right size serpentine belt. Used a string around all three pulleys to obtain the size required. Tech and sales support were always right on it and received the new belts a day or two later. Used the OEM tensioning arm and settled on a 52 inch belt.
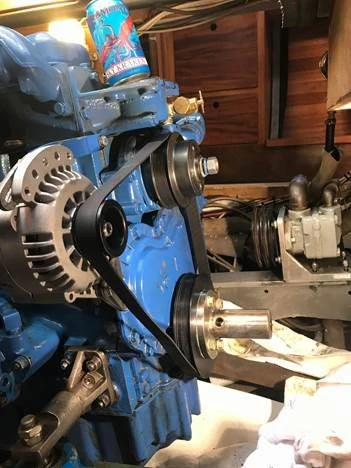
Belt on, starting to come together.
Tensioning arm on, expansion tank on. Engine back together, Conversion completed.
ElectroMaax PRO Regulator Installation
The installation is actually straightforward and easy. The line diagram appears complex with multiple sensors but ElectroMaax has facilitated the installation tremendously with sensor hubs and “plug and play” harnesses.
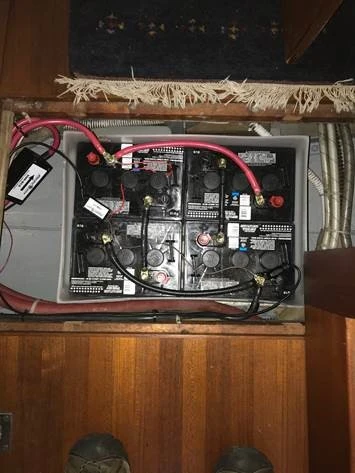
Main or House battery bank has (3) sensors: current, voltage and temperature.
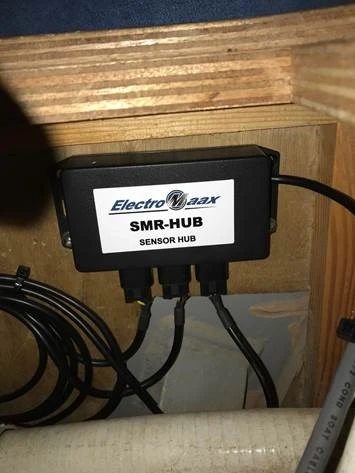
The (3) sensors from the House battery bank plug into a hub that can be conveniently mounted away from the battery bank. A sensor wire from the hub connects to the regulator.

Cruiser 160 amp alternator with serpentine belt conversion. There are (2) sensors: temperature and current and the main regulator harness all lead back to the regulator.

Up and running with Electromax Cruiser 160 amp and Pro regulator. View of the wiring with sensors, E-MAAX PRO harness and OEM harness.
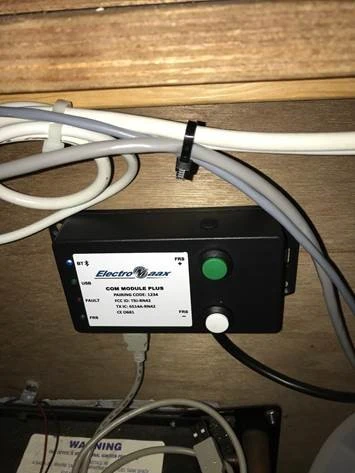
System monitoring and setup is with the COM Module PLUS connected to the regulator and via a USB or Bluetooth to a tablet or laptop.
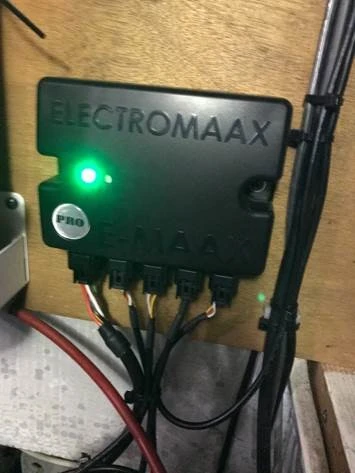
E-MAAX PRO regulator with main alternator harness, alternator current sensor, alternator temperature sensor, house bank hub sensor and COM Module PLUS.
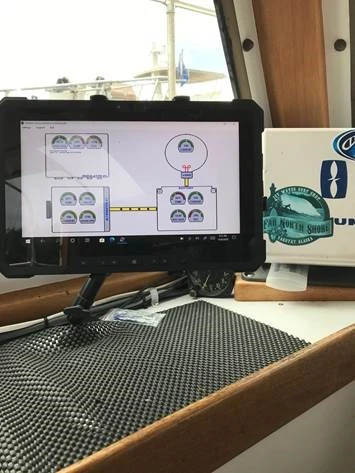
USI (User System Interface) wireless display of ElectroMaax charging system with PRO regulator
Ready for sea trials
Finally
Sales and tech have been fantastic with prompt and courteous support when needed. This is not an easy conversion but then most boat projects never are and usually take 2 to 3 times longer than expected. Absolutely pleased with performance so far and very pleased to have one alternator taking the place of two.